Talk about image SEO, and the first thing that usually comes to mind is optimizing alt tags, but there is so much more that should go into optimizing your images.
In fact, it is safe to say that image optimization is one of the more overlooked areas of SEO; but that doesn’t have to be the case.
It is not uncommon to find that a site has images with huge file sizes, nondescript file names and that these are displayed at far smaller dimensions on the site than the original image.
Often, the problem is that beginner’s guides to SEO only cover the basics, and that means that optimizing alt tags is pretty much all that is ever mentioned.
But let’s not forget that image search in itself is a big deal and can drive significant amounts of traffic to your site. Our recent visual search guide does a great job of showcasing just what a big deal image search is.
And let’s face it, who hasn’t used it as a way to browse pictures of kittens?!

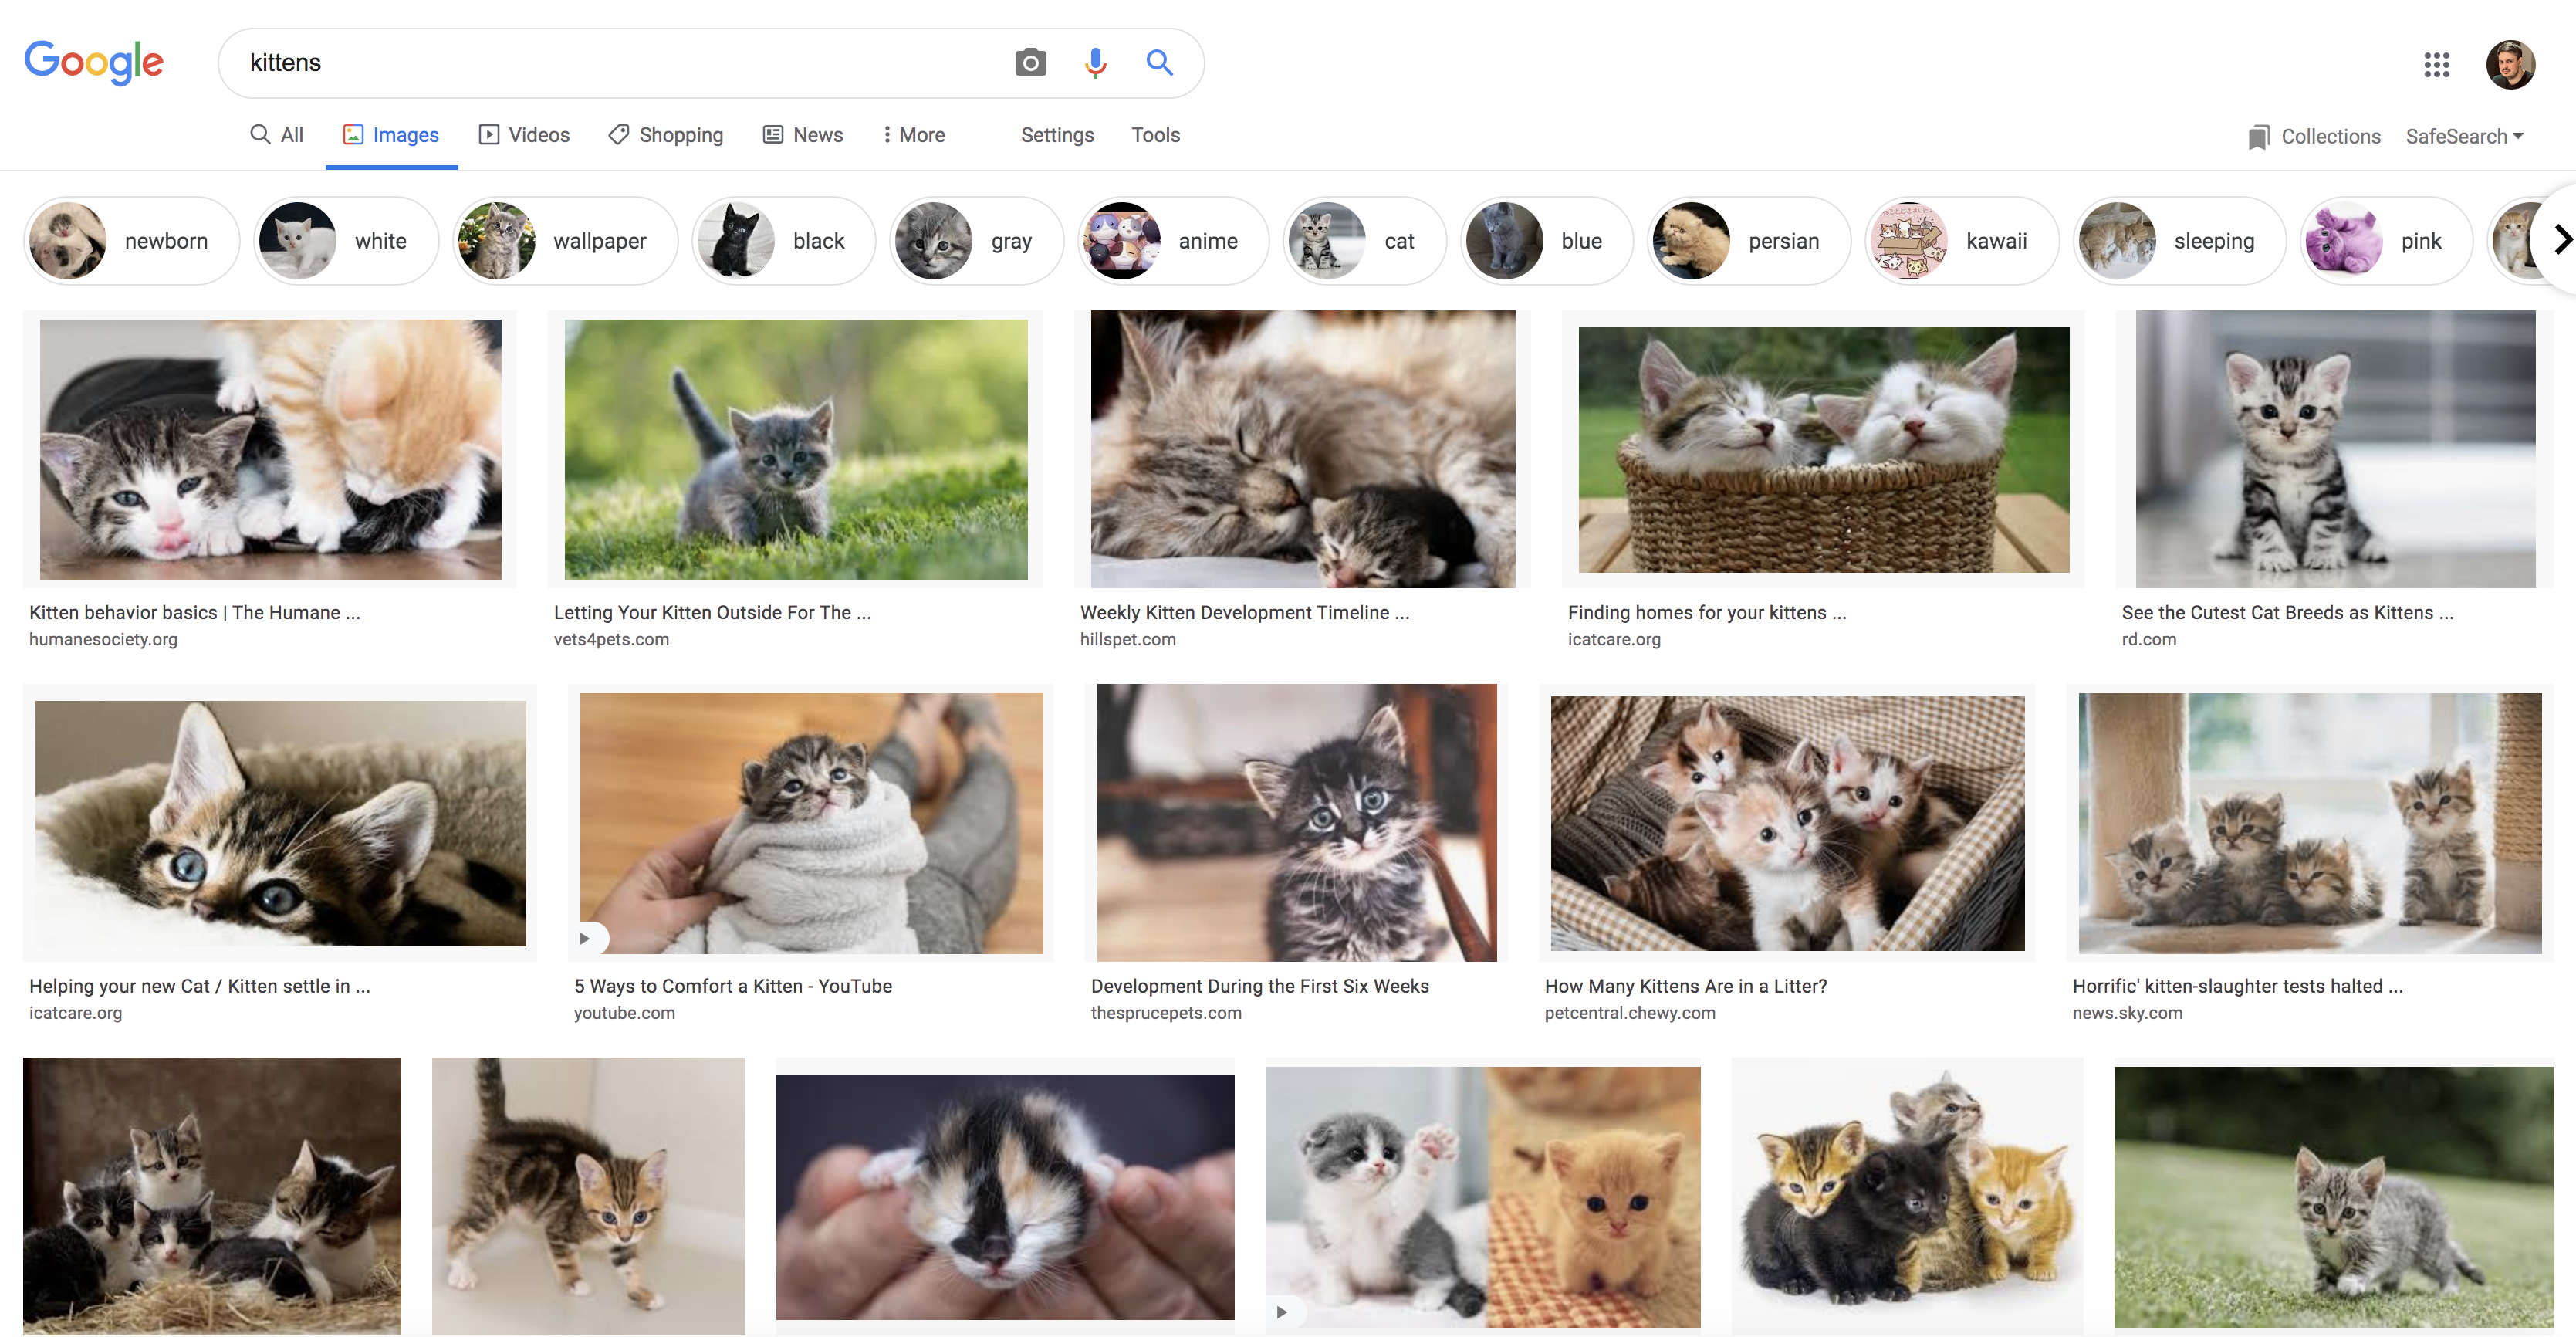
Image SEO isn’t something that should be ignored, and in this guide, we will walk you through the steps you can take to optimize your site’s images and rank higher on image searches.
In this image SEO guide, we will cover:
Why Are Images So Important?
Images help to give context to your content.
The right images can help a user better understand and engage with written content and help break up otherwise large blocks of text.
There are few things less engaging than a solid block of a couple of thousand words.
But users aside, Google’s vision for the future is to make a move towards visual search, and this kickstarted with a full revamp of Google Images a couple of years back.
We are increasingly seeing images occupying prime real estate on the SERPs, often above the usual organic results.

Important point: Images should be chosen with care.
We are all used to seeing the same stock image on every other website, and the true value comes when you use bespoke images that help to communicate the story that you are trying to tell.
You can’t ignore the importance of images and image search. Optimizing images should form part of your ongoing SEO strategy and be seen as one of the best practices you should follow.
What is Image SEO?
More commonly referred to as image optimization, image SEO is all about improving your site’s images for two main reasons:
- To rank higher on Google Image Search.
- To improve the overall visibility and optimization of a web page.
And this means carrying out a number of different tasks that will help Google better understand your site’s images, including correctly naming files, adding and optimizing alt text, reducing file sizes, and more.
One of the questions that is often asked in relation to image SEO is whether or not these tasks are still necessary, given Google’s advancement in the use of AI and machine learning for image recognition?
The simple answer is yes. Google still can’t read all types of images, even though their ability to do so has improved significantly in recent years. It is also important to know that image SEO isn’t just about helping search engines to understand what an image shows.
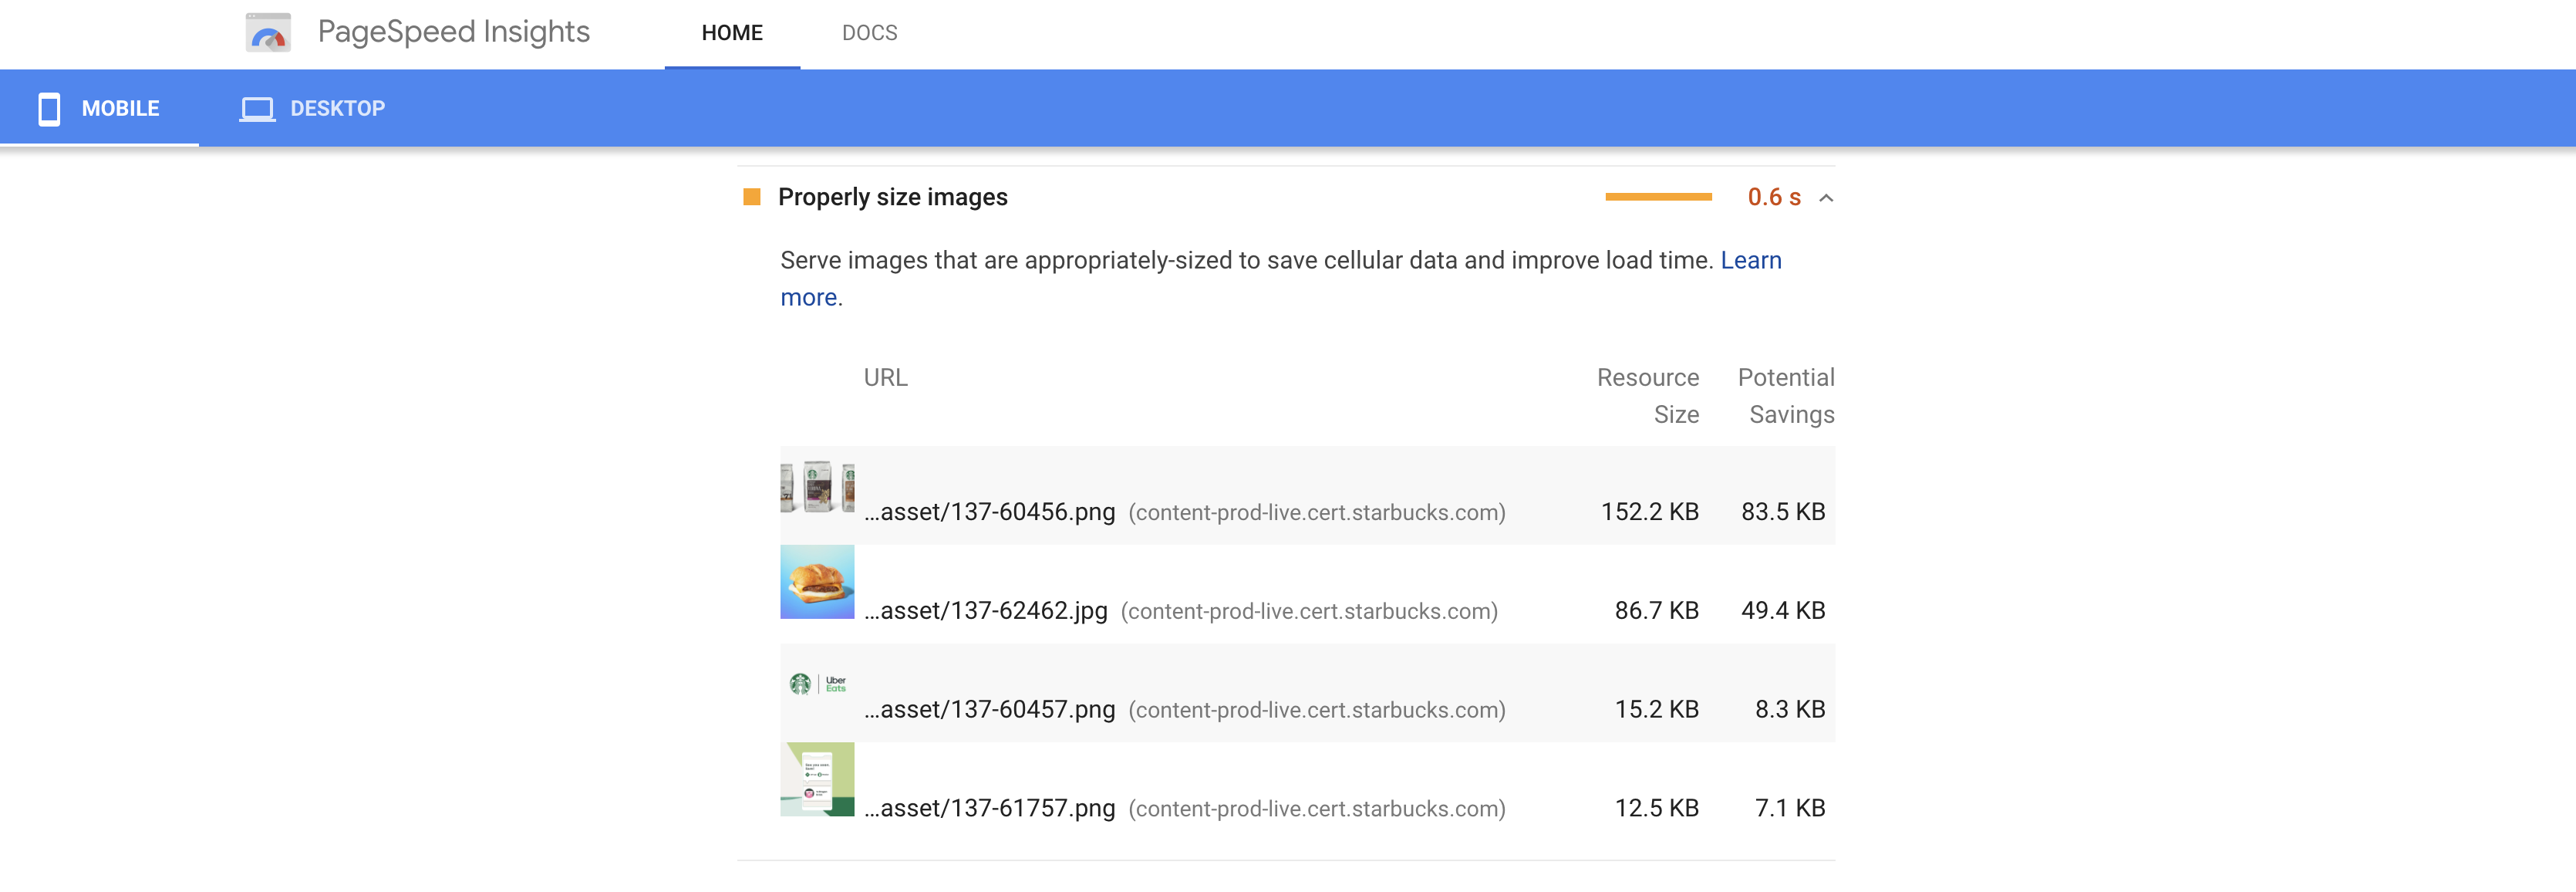
Poorly optimized images are one of the main causes of slow web pages, and improvements made can have a big impact on how fast your site loads and your PageSpeed score.
Yet image SEO often stops with optimizing alt tags. And there is no denying that this is an important part of the process, but it is only one of them.
That said, understanding alt tags and alt text and their purpose is a great starting point.
What Are Alt Tags and Alt Text?
You often hear SEOs talking about optimizing alt tags or alt text; they are also sometimes referred to as alt descriptions or alt attributes. They are used interchangeably to refer to the same thing.
But what are they?
Here is how Matt Cutts explained it a long time ago, in an easy to understand way. (We all miss Matt)
Alt tags provide a text alternative for an image for search engines and those using screen readers to access a web page. The original purpose and use of alt text was to help make images accessible to the blind and those with impaired sight.
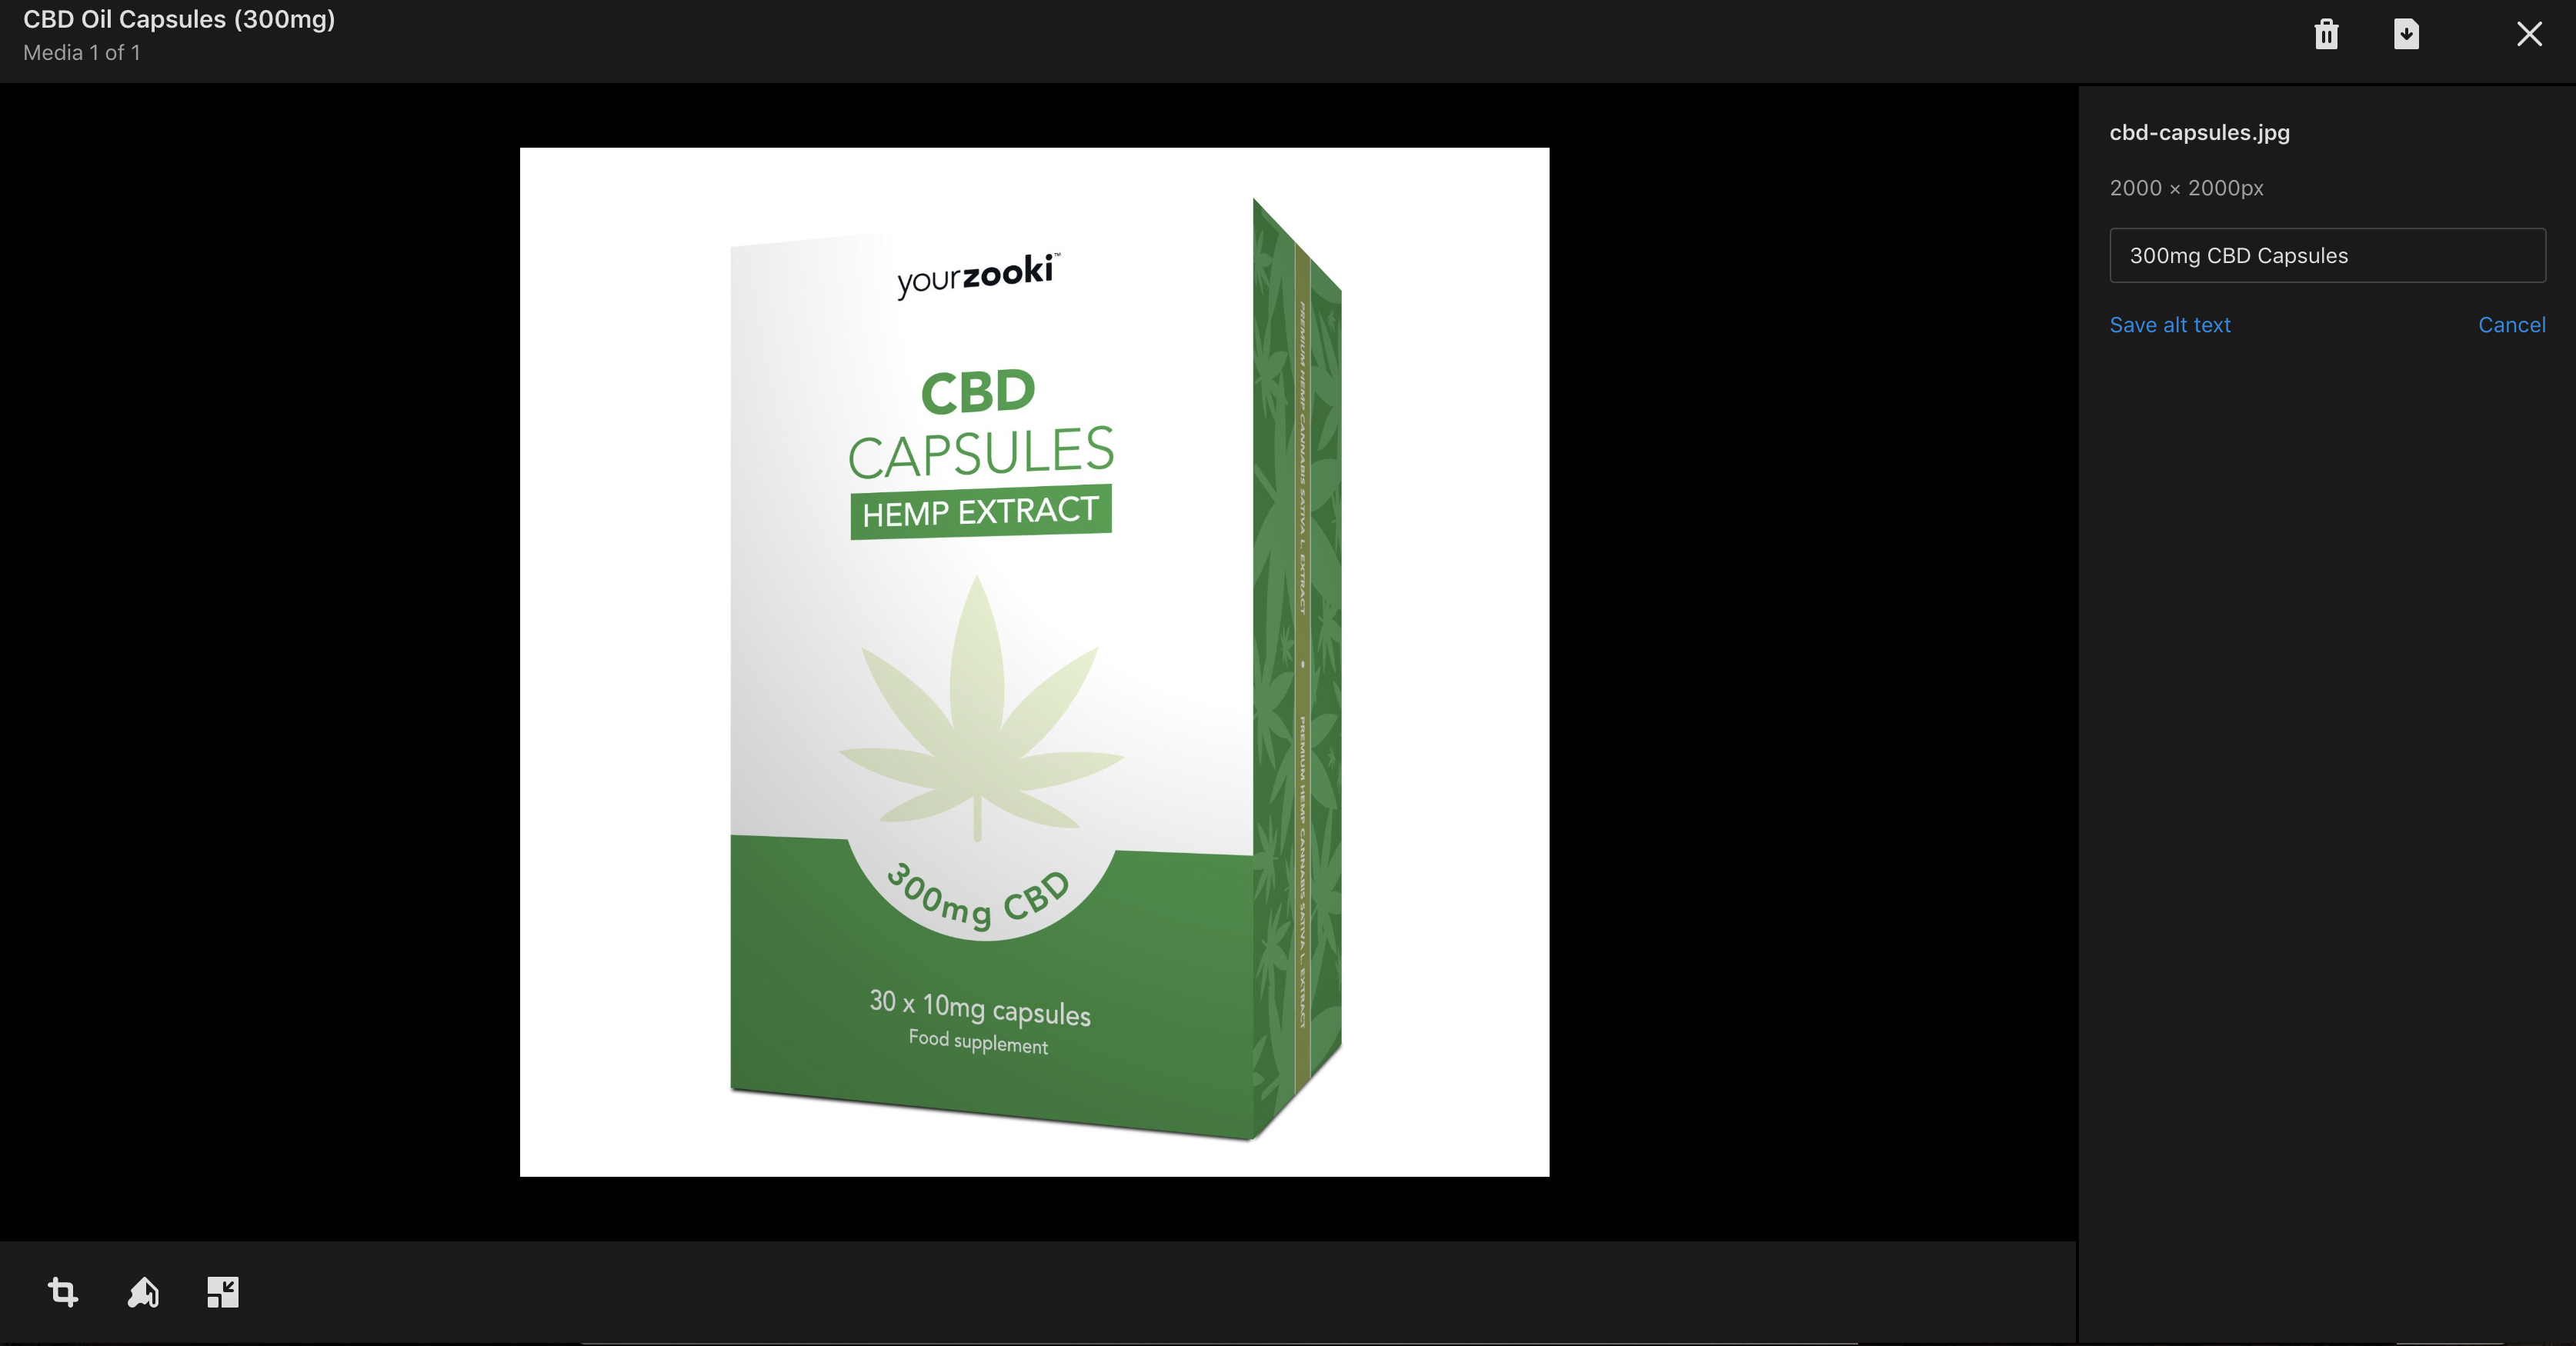
Quite simply, they are a text description for each image that clearly describes what it shows.
They are part of the HTML code within an image tag, and look like this:
<img src="cute-kitten-playing-ball.png" alt="cute kitten playing with a ball" />.Alt text is the descriptive content that sits within the alt attribute given to an image tag.
Alt text can help improve your site’s SEO performance by adding further relevancy signals to a web page and help Google better understand the contents of an image and help it rank.
But so many get this wrong, and you wouldn’t have to look too far to find a page where all of the images use the same alt text – an exact match of a page’s main target keyword.
How To Optimize Alt Text
There are best-practice rules that you should follow when optimizing your image’s alt text.
Crafting descriptive alt tags doesn’t need to be difficult. It is best not to overthink it too much and be led by the content of the image.
Often, writing great alt text means using common sense to describe what the image shows. We can break this down to just three best-practice rules you should follow.
THE 3 RULES OF ALT TAGS
1. Be Descript and Specific
Alt text should always describe the contents of an image in as much detail as possible.
The more specific you can be when describing an image, the better, as this will help it rank on Google Image Search and give context as to how it relates to your page’s content.
2. Be Relevant
Alt tags aren’t a place to spam exact-match keywords and should be used to describe exactly what an image shows.
Alt tags should absolutely be relevant.
Try and write alt text that describes images in a way that relates to the topic of the page that it is on, especially when an image is more generic in nature and isn’t as specific as others.
3. Be Unique
Don’t use your page’s main target keyword as the alt tag for every image on the page.
Always be sure to write unique alt text that describes the specific contents of the image, rather than repeating the contents of another.
But what does well-optimized alt text look like in practice? Let’s write one for this image of two kittens:


An alt tag that is descript, relevant, and unique could look like this:
alt="two cute ginger kittens sleeping with balls of wool"This is descriptive for search engines and screen readers while including keywords.
How to Add Alt Tags on Popular Website Platforms
Several website platforms have alt text options set up already; you just have to access them.
How To Add Alt Text to Images on WordPress
If you are using WordPress, it is really easy to add alt text to your images.
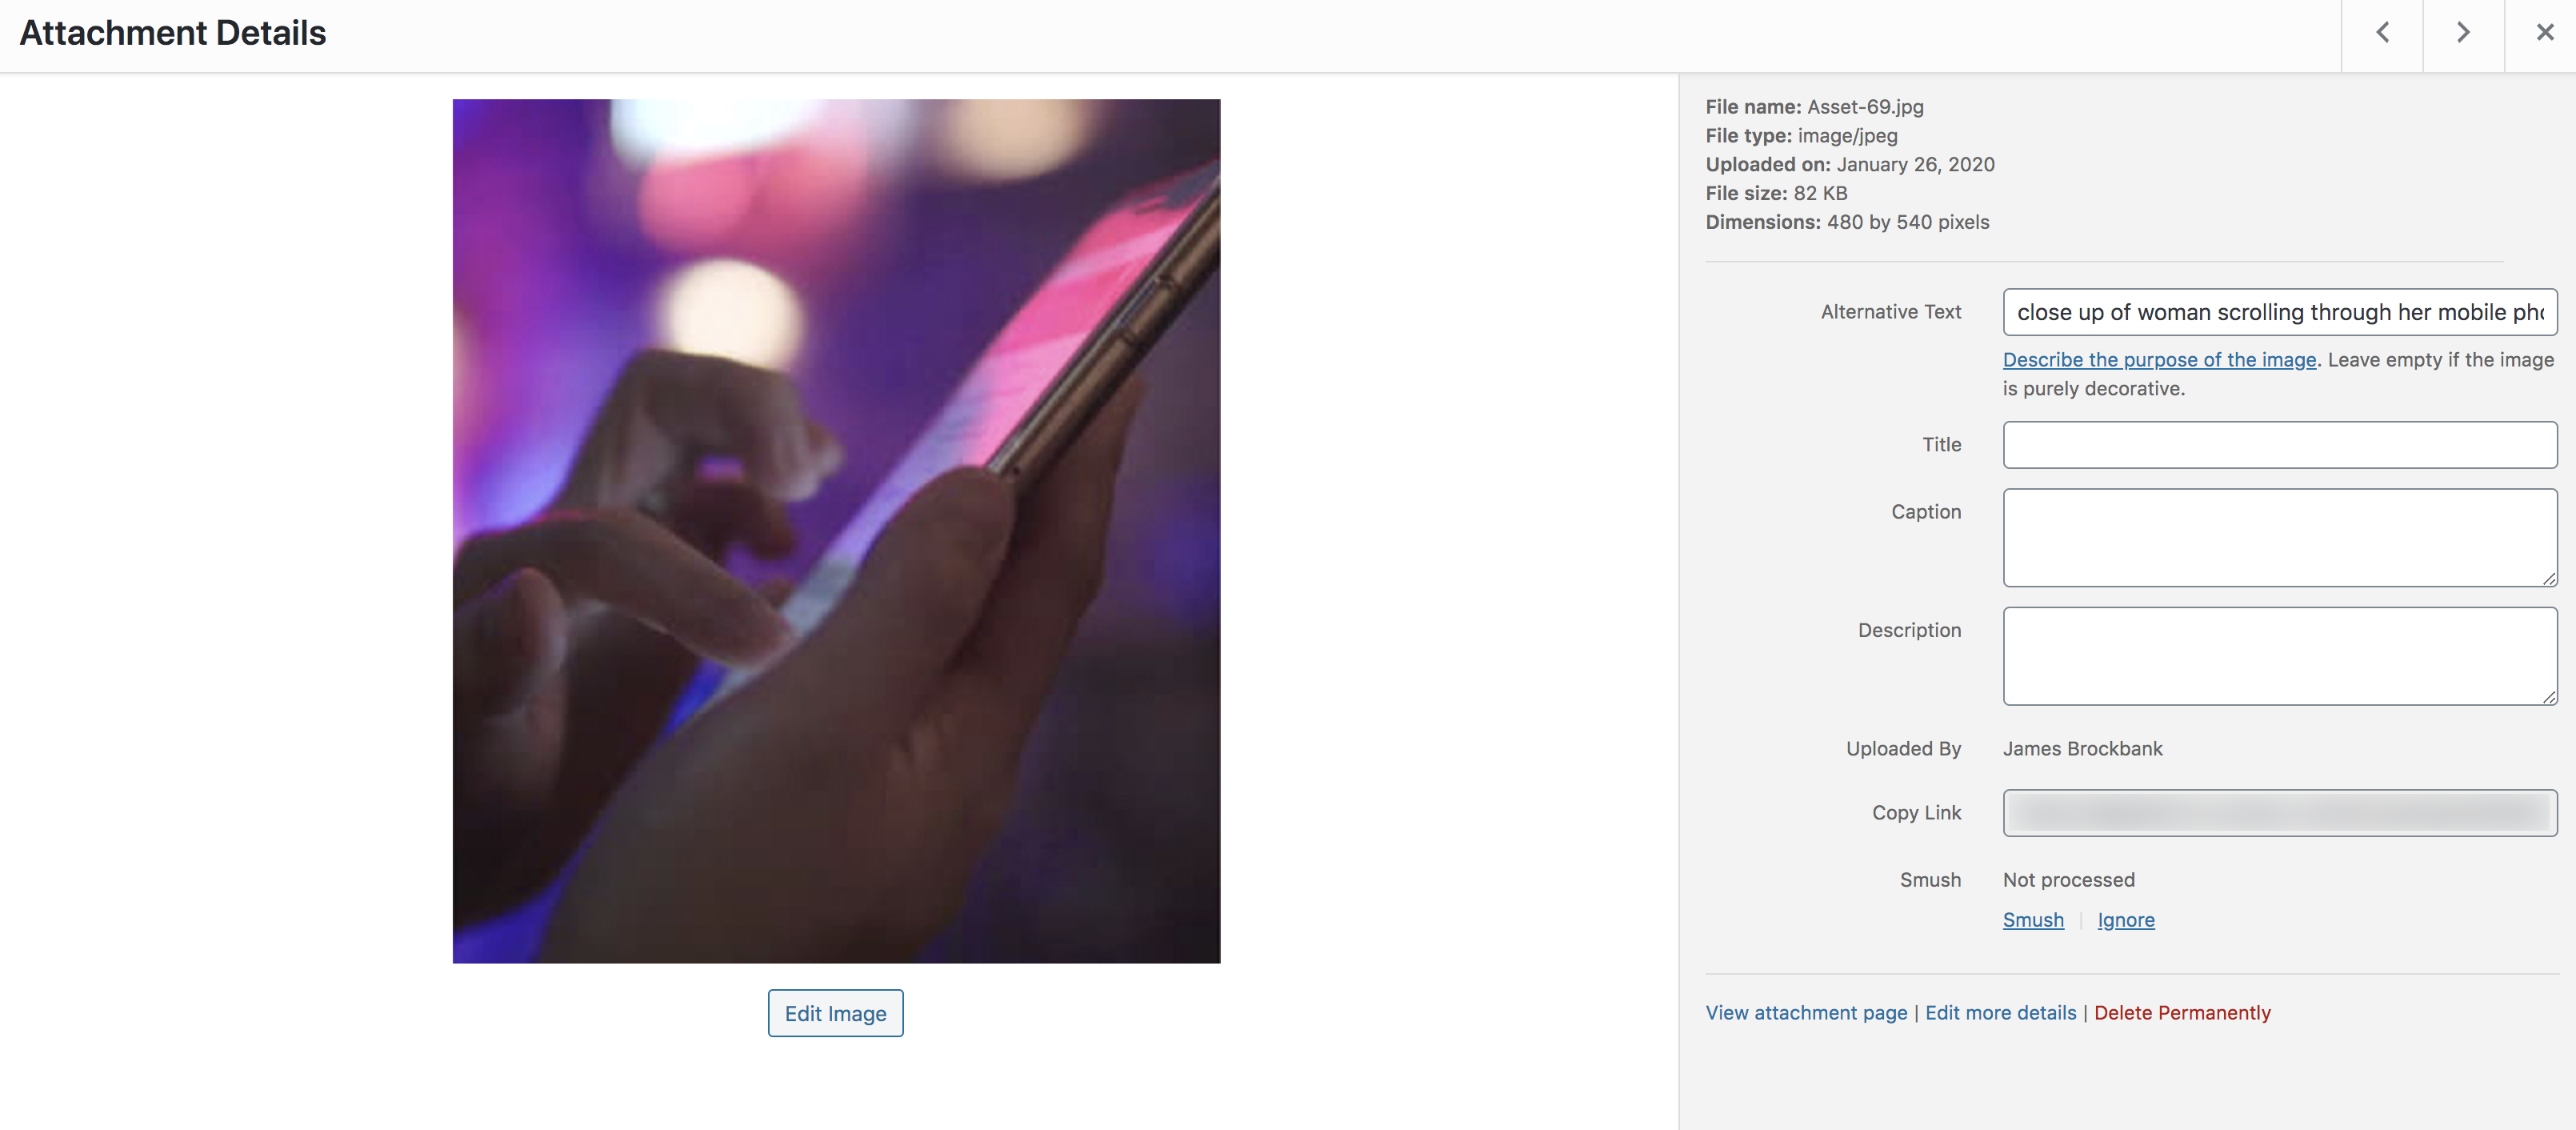
Simply click into an image in the editor window, and you will see a field appear for this on the Image Settings tab.

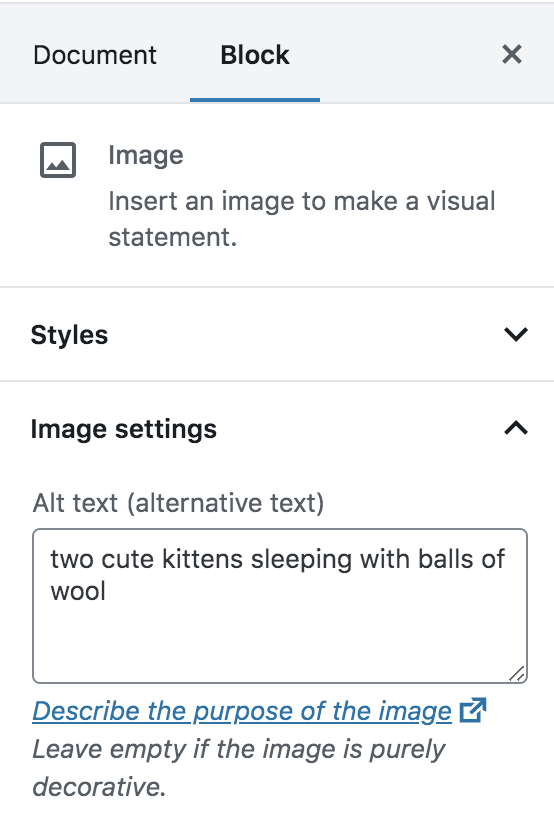
Alternatively, click into an image from the media library, and you will see the options here, also.

How To Add Alt Text to Images on Shopify
If you are using Shopify, you can add alt text to both theme images and product images.
To optimize the alt text on product images, head to Products > All products and click into the product listing you want to edit.
On the product details page, click into a media item and find the preview media page. You can now click to add alt text.

To add alt text to theme images, head to Online Store > Themes and click to customize your store’s theme.
You will see the sections menu down the left-hand side of the page where you can click into image blocks and, from there, into individual images.
You will see a text box where you can add your alt text.

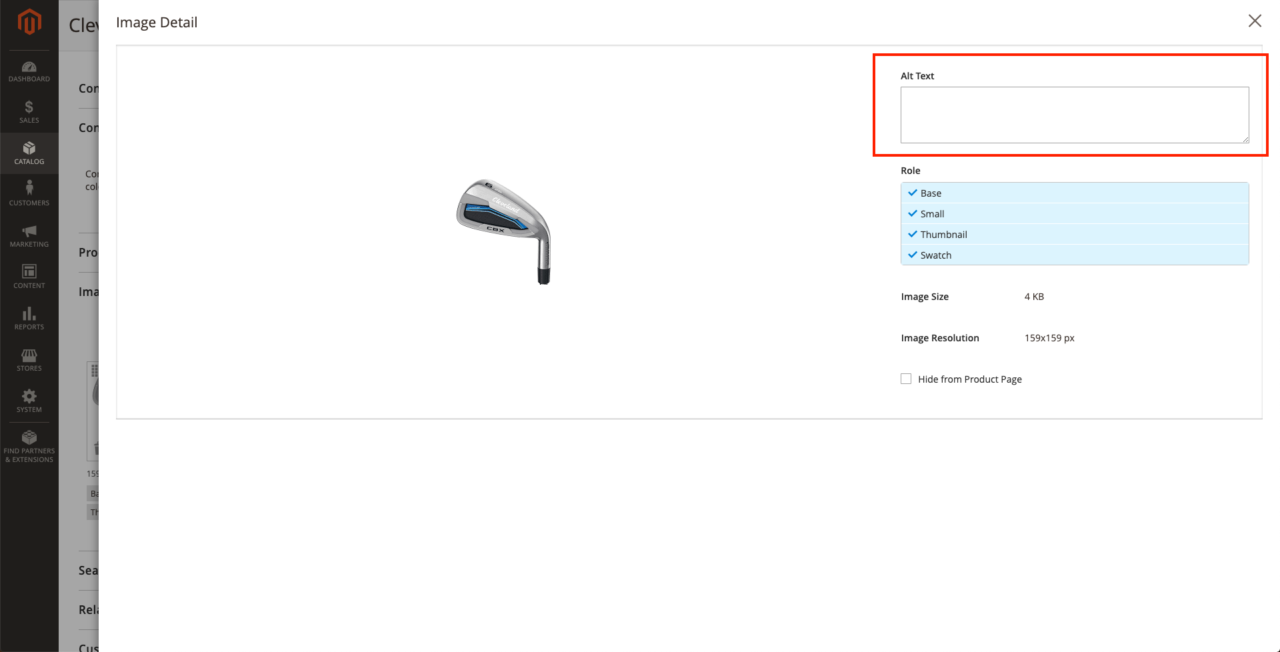
How To Add Alt Text to Images on Magento
It is really easy to add alt text to images on a Magento store.
To do so, click into Catalog > Products, choose the product that you want to add alt text to, and scroll to the Images and Videos section.
Click into an image, and you can edit the alt text.

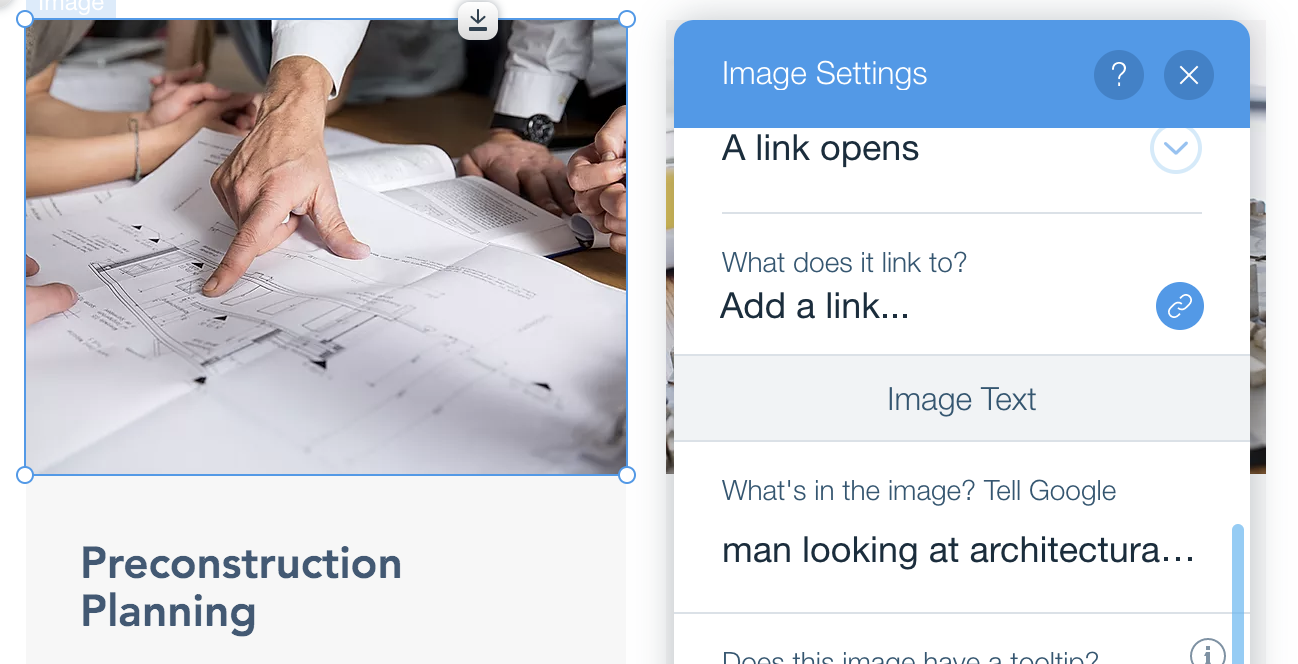
How To Add Alt Text to Images on Wix
Not too long ago, you couldn’t add alt text to images on a Wix store. But the platform has invested resources into fixing common SEO frustrations in recent years, and alt text editing is now possible.
You can add alt text to images on the edit window by clicking into the one that you want to add alt text to and opening up the settings options.
From here, you will see an option for ‘What’s in the image?’ and that is where you can add your alt text.

How Images Impact PageSpeed Scores
It is not uncommon to see that image optimization is cited as one of the main ways to improve your site’s PageSpeed score when using the Google PageSpeed Insights tool.
Large images are the most likely culprit here, and it makes sense.
Larger images take longer to download, and this, in turn, slows down your page’s loading time.

You can read more about how to improve your PageSpeed score in this guide.
7 Advanced Image Optimization Tips: Beyond Alt Text
Image optimization should go way beyond just adding alt tags.
There are a number of things that you can do to improve your site’s overall organic performance, as well as to optimize images to rank higher on Google Image Search.
Many problems originate from simply opting to upload raw images to your site without putting in a little bit of work first – never a good idea.
Here are 7 of the most effective advanced link optimization tips for you to use:
1. Name Your Images Properly
Google publishes a guide of its own image best practices, and one of the simplest takeaways from this is that you should make sure that you are using descriptive image names.
As an example, using “jordan-air-1-mid-front.jpg is better than IMG00353.JPG.”
When you export images from a camera or smartphone (or even take a screenshot), they are given generic filenames. Don’t upload an image with the filename it has given by default. Instead, give it a descriptive name that helps to give context to what it shows and separate the words with dashes, not underscores.
Make this task part of your checklist when uploading images.
If you have already uploaded images to a page, go ahead and update the filenames to be descriptive. It won’t take long and is a worthwhile use of time.
2. Resize Images to The Display Dimensions
Another common issue with images is that the image file is much larger in pixel dimensions than the image that is being used on your site.
As an example, the main camera on an iPhone X produces images of 4032px x 3024px.
But let’s say the maximum width that this image will display on your site is 600px.
The difference in file size between an image that’s 4032px wide compared with 600px wide will significant, and using multiple images that are larger than their display size can quickly contribute to a massively increased page file size.
Be sure to resize images to their maximum display dimensions.
If you are using WordPress, you can use a plugin such as Resize Image After Upload to help you to do this. Otherwise, resizing images in Photoshop works, as can using a tool like Canva.
You should also make sure that you are scaling images responsively with CSS
3. Reduce Image File Sizes
One of the simplest ways to reduce the file size of your images is to resize them to your maximum display dimensions, but that is not the only way.
In fact, this is again something that Google recommends in their image optimization guidance:
For best results, experiment with various quality settings for your images, and don’t be afraid to dial down the quality – the visual results are often very good, and the filesize savings can be quite large.
How can you reduce the file size of your images?
By using one of Google’s three recommended open-source tools:
But if you are not familiar with using tools like these or want a faster web-based solution, you can use a tool such as Optimizilla that will allow you to compress your images.
Or, if you are using WordPress, try the Smush plugin.
4. Create an Image Sitemap
If you are serious about Google discovering all of the images on your site and having these perform in Google Image Search, you should create a dedicated sitemap that includes the URLs of all images.
Quite simply, creating an image sitemap increases the chance of your images showing up in search results, and while you can reference images in an existing sitemap, it usually makes the most sense to create a dedicated map search engines can use.
Here is an example that Google gives, to help you to understand the format you need to use.
<?xml version="1.0" encoding="UTF-8"?>

<urlset xmlns="http://www.sitemaps.org/schemas/sitemap/0.9"

xmlns:image="http://www.google.com/schemas/sitemap-image/1.1">

<url>

<loc>http://example.com/sample.html</loc>

<image:image>

<image:loc>http://example.com/image.jpg</image:loc>

</image:image>

<image:image>

<image:loc>http://example.com/photo.jpg</image:loc>

</image:image>

</url>

</urlset>
There is one key difference when creating an image sitemap than creating one that includes your web pages.
As Google says, “Image sitemaps can contain URLs from other domains, unlike regular sitemaps, which enforce cross-domain restrictions. This allows you to use CDNs (content delivery networks) to host images.”
And this leads nicely into understanding why you should host images on a CDN.
5. Host Images on a CDN
Most commonly, the entirety of a website will be hosted on one server.
But let’s imagine a scenario where a website is hosted in the US but is visited by a user somewhere in Europe.
Assets, such as images, will need to travel further to the user in Europe, slowing down the page’s loading time.
A CDN (content delivery networks) works by caching your website’s images across multiple servers in different locations across the world, meaning that these can then be served to a user from the location that’s closest to them.
Popular CDN’s include Cloudflare, Fastly, KeyCDN, and Amazon CloudFront.
You can easily set up a CDN on WordPress through plugins such as W3 Total Cache, or for further guidance, you will find helpful integration guides from each provider, such as this from Cloudflare.
We also recommend that you check out our guide on must know SEO practices for CDNs.
6. Implement Lazy Loading
We can’t ignore the fact that images are usually the assets on a page with the largest filesize and, therefore, the cause of slower site speeds.
We can’t simply do without images; that is not an option because they are too important to providing a great user experience.
But we can use lazy loading to defer a browser from loading an image until it is needed.
Lazy loading simply means that assets aren’t loaded until they are needed. Meaning that the page loads up when a user first lands on it much quicker. And it is not just used for images; assets like JavaScript can also be loaded in this way.
Think about it this way – if a user never scrolls down to the second half of a page, those assets will never be loaded. And this brings noticeable performance improvements.
Looking, again, at what Google says on this, alongside serving lazy loading as a recommendation in PageSpeed Insights:
Lazy loading can significantly speed up loading on long pages that include many images below the fold by loading them either as needed or when the primary content has finished loading and rendering.
To learn how to implement lazy loading on your site, take a look at this guide.
7. Leverage Browser Caching
You will often see Google PageSpeed Insights recommending you to leverage browser caching.
Quite simply, browser caching is when files are stored by a visitor’s browser, meaning that assets load faster when they next visit the page.
When you visit a page, the images are downloaded and then displayed in the browser. Without browser caching, next time this user visits the page, these will all need to be downloaded again. But with browser caching, the browser will already have these stored, meaning the page loads much faster.
Browser caching is noticeably impactful on sites where users frequently revisit the same pages.
You can learn more about how Google recommends using caching here.
If you are using WordPress, one of the popular cache plugins can help you to implement this quickly. If not, this guide from GTmetrix will help you to do so.
Image Optimization and Google’s Page Experience Update
Google recently announced that they are set to roll out their Page Experience Update at some point in 2021.
This update will take into account a number of existing ranking factors, including the safe browsing penalty, the intrusive interstitials penalty, HTTPS as a ranking factor, the mobile-friendly update, Page Speed update, and Core Web Vitals.
If you missed the announcement, this essentially means that, as defined at Search Engine Land, “All other considerations being equal, this update means that Google is more likely to rank your pages higher if they provide a good user experience.”
But how does this relate to image optimization?

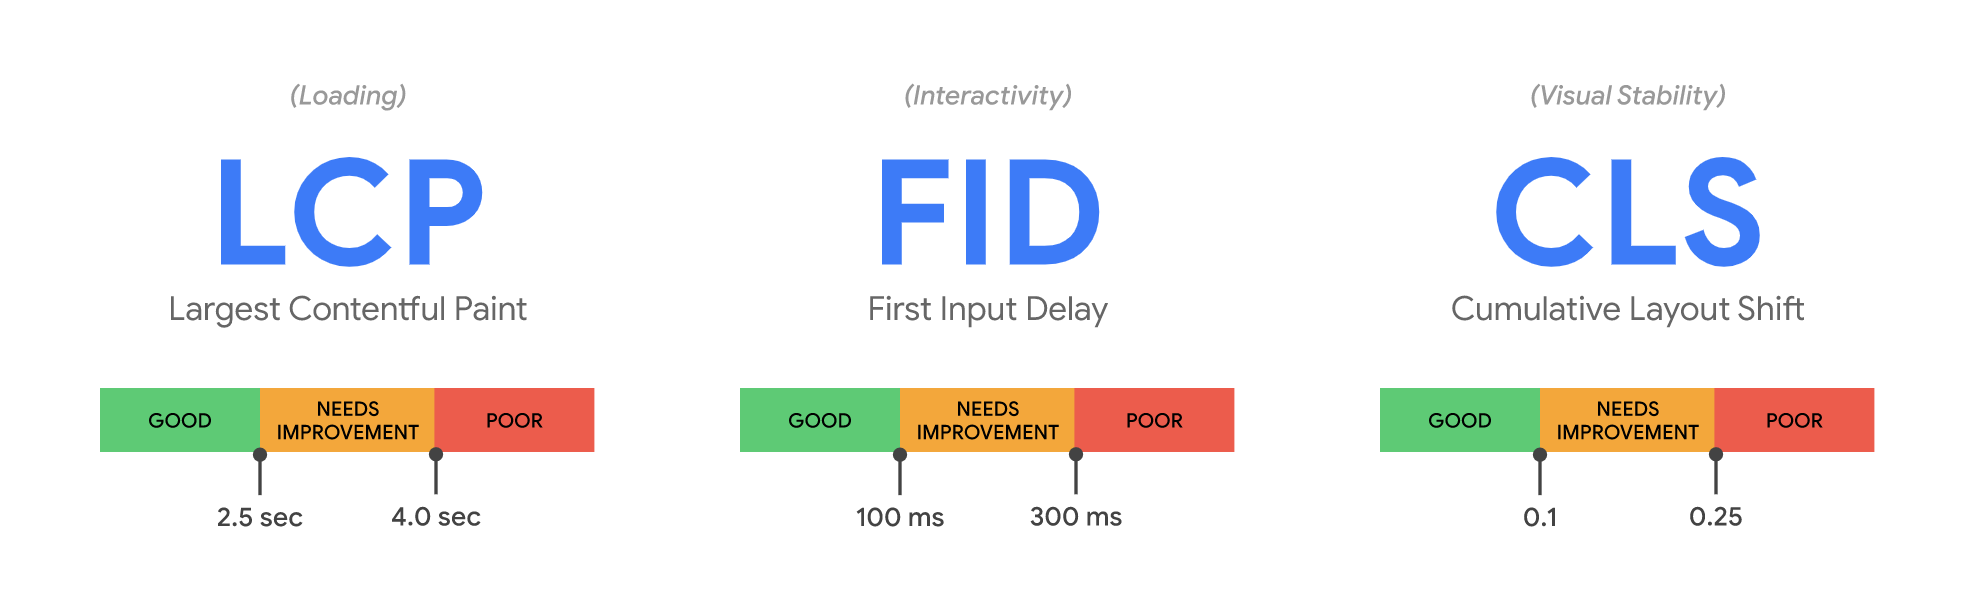
First, you will notice that Core Web Vitals is one of the factors that will be taken into account, and this includes LCP – Largest Contentful Paint. This essentially shows how fast a page feels; when a user believes the page has loaded.
LCP is calculated by Google timing the rendering of the largest content element on the page, and this is often images.
CLS (Cumulative Layout Shift) is another Core Web Vital, and this is what happens when content keeps moving even when a page seems to have fully loaded. In simple terms, this can be optimized by including size attributes on your images (and videos).
But lastly, we need to remember that the Page Experience Update also takes into account Page Speed, and we have seen above the ways in which images can impact this.
Finding Issues With Your Site’s Images
We have now looked at how you can optimize your site’s images, but how can you find issues that already exist on your site?
You can use the SEMrush Site Audit Tool to highlight these issues. The issues tab of your site audit is perhaps the quickest way to get started, showcasing the following issues:
Broken Internal and External Images
Broken images make for poor user experience; you should prioritize fixing any images that don’t display.
The site audit tool will clearly highlight any broken images on your site so you can either update incorrect URLs or replace the image.

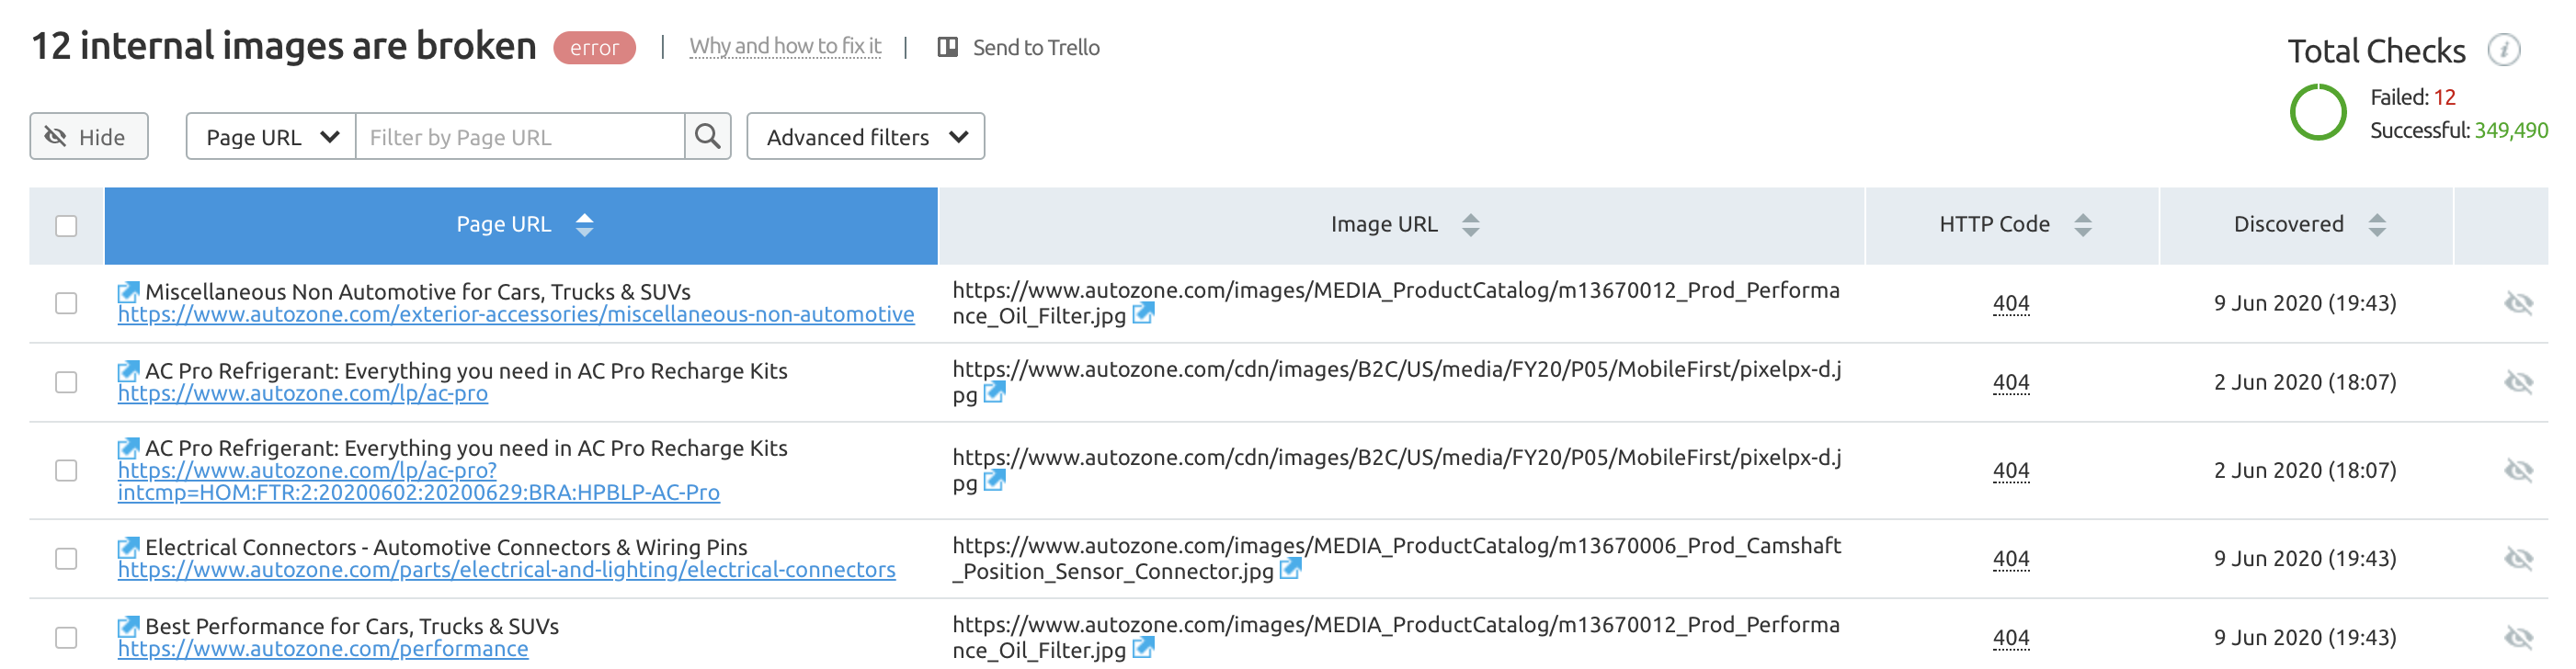
The audit will also highlight any broken external images, as well, and the best practice here is to replace this image, given that you won’t control the source.
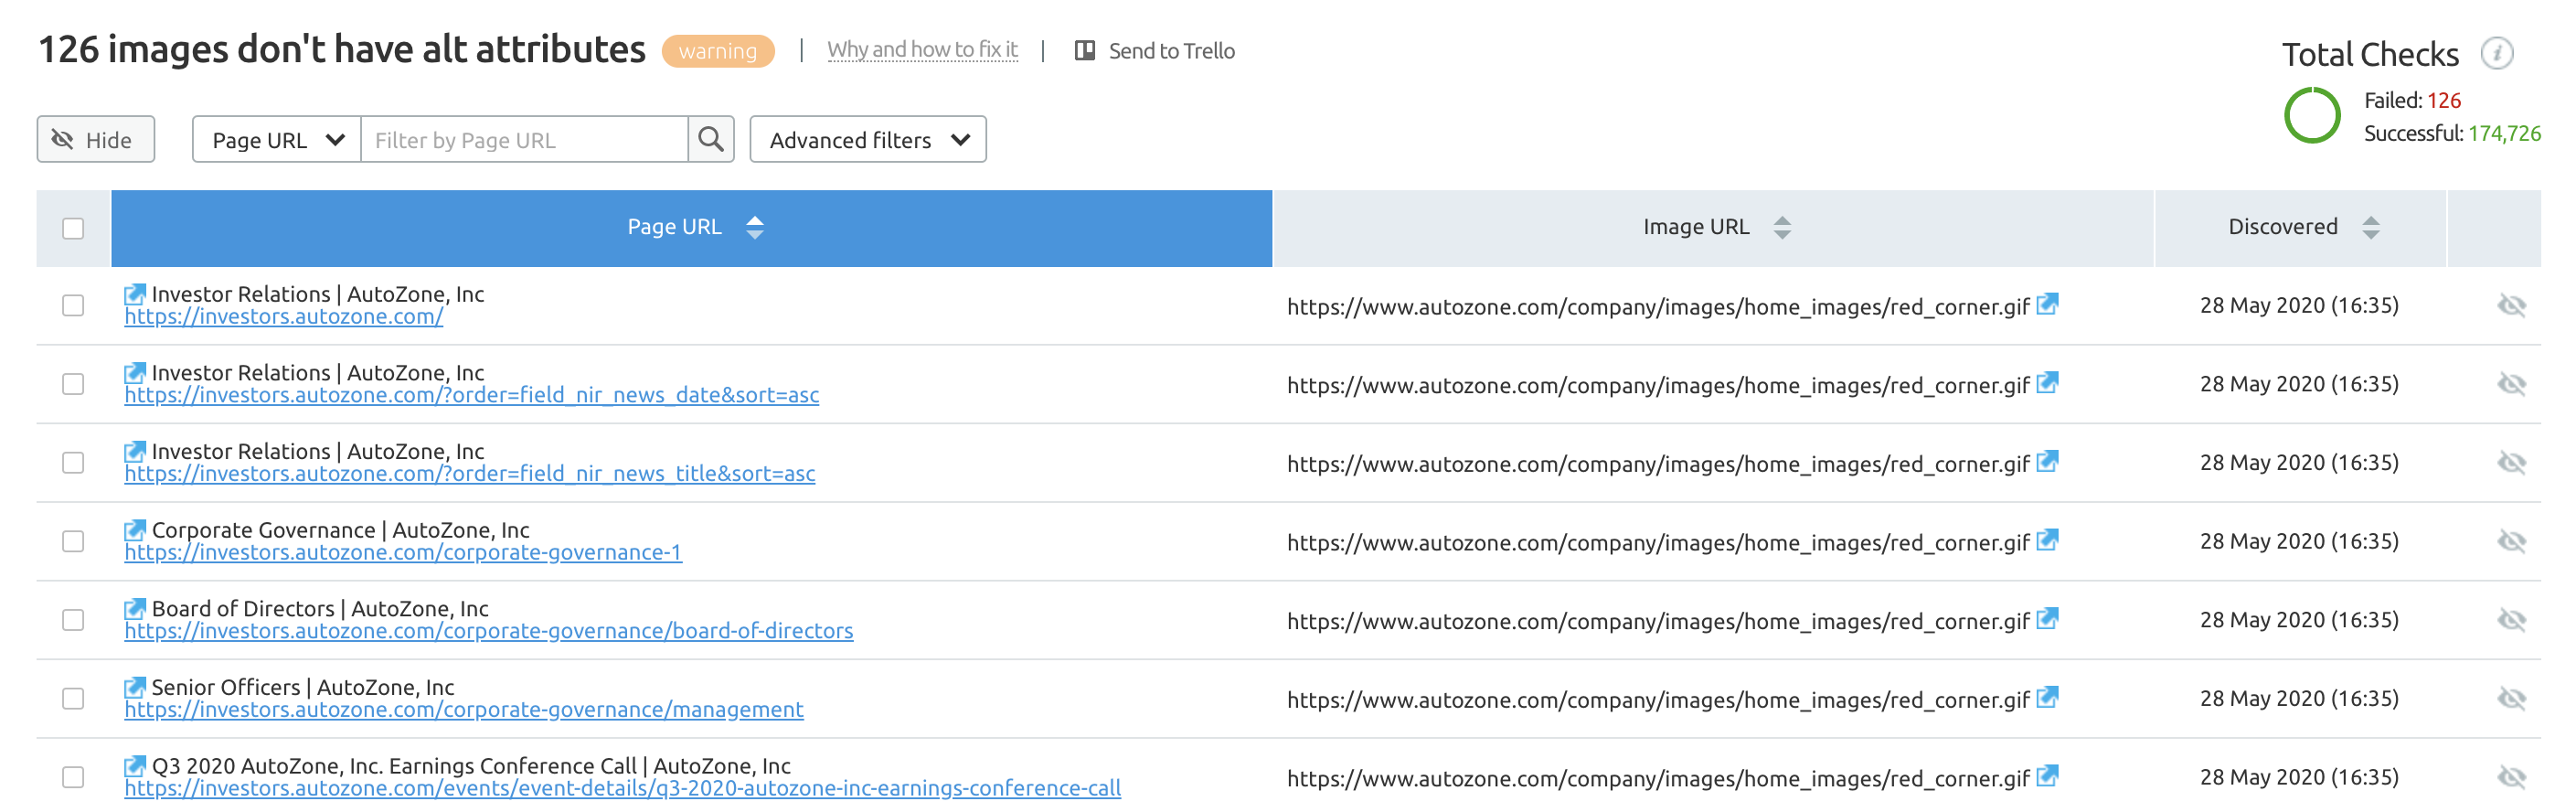
Images Without Alt Attributes
We have looked at the importance of optimized alt text for your images, and the site audit report will clearly return a list of all of those on your site that do not currently have them.
This ultimately makes the job of adding alt text that little bit easier, giving you a list to work through on a page by page basis.

Take Image SEO Seriously for User Experience and Search Engines
Taking the time to optimize your images properly, can have a noticeable impact on your site’s traffic from Image Search, as well as improving your user’s experience through faster loading times.
And let’s not forget that optimizing image file names and alt tags also helps to give contextual relevance to the rest of your page, improving the organic visibility of the page as a result.
Many SEOs overlook image optimization, but with Google’s Page Experience update coming next year, there has never been a better time to prioritize this.
This marketing news is not the copyright of Scott.Services – please click here to see the original source of this article. Author:
For more SEO, PPC, internet marketing news please check out https://news.scott.services
Why not check out our SEO, PPC marketing services at https://www.scott.services
We’re also on:
https://www.facebook.com/scottdotservices/
https://twitter.com/scottdsmith
https://plus.google.com/112865305341039147737
The post Image SEO and Alt Tags: 7 Advanced Image Optimization Tips to Increase Traffic with Images appeared first on Scott.Services Online Marketing News.
source https://news.scott.services/image-seo-and-alt-tags-7-advanced-image-optimization-tips-to-increase-traffic-with-images/
No comments:
Post a Comment